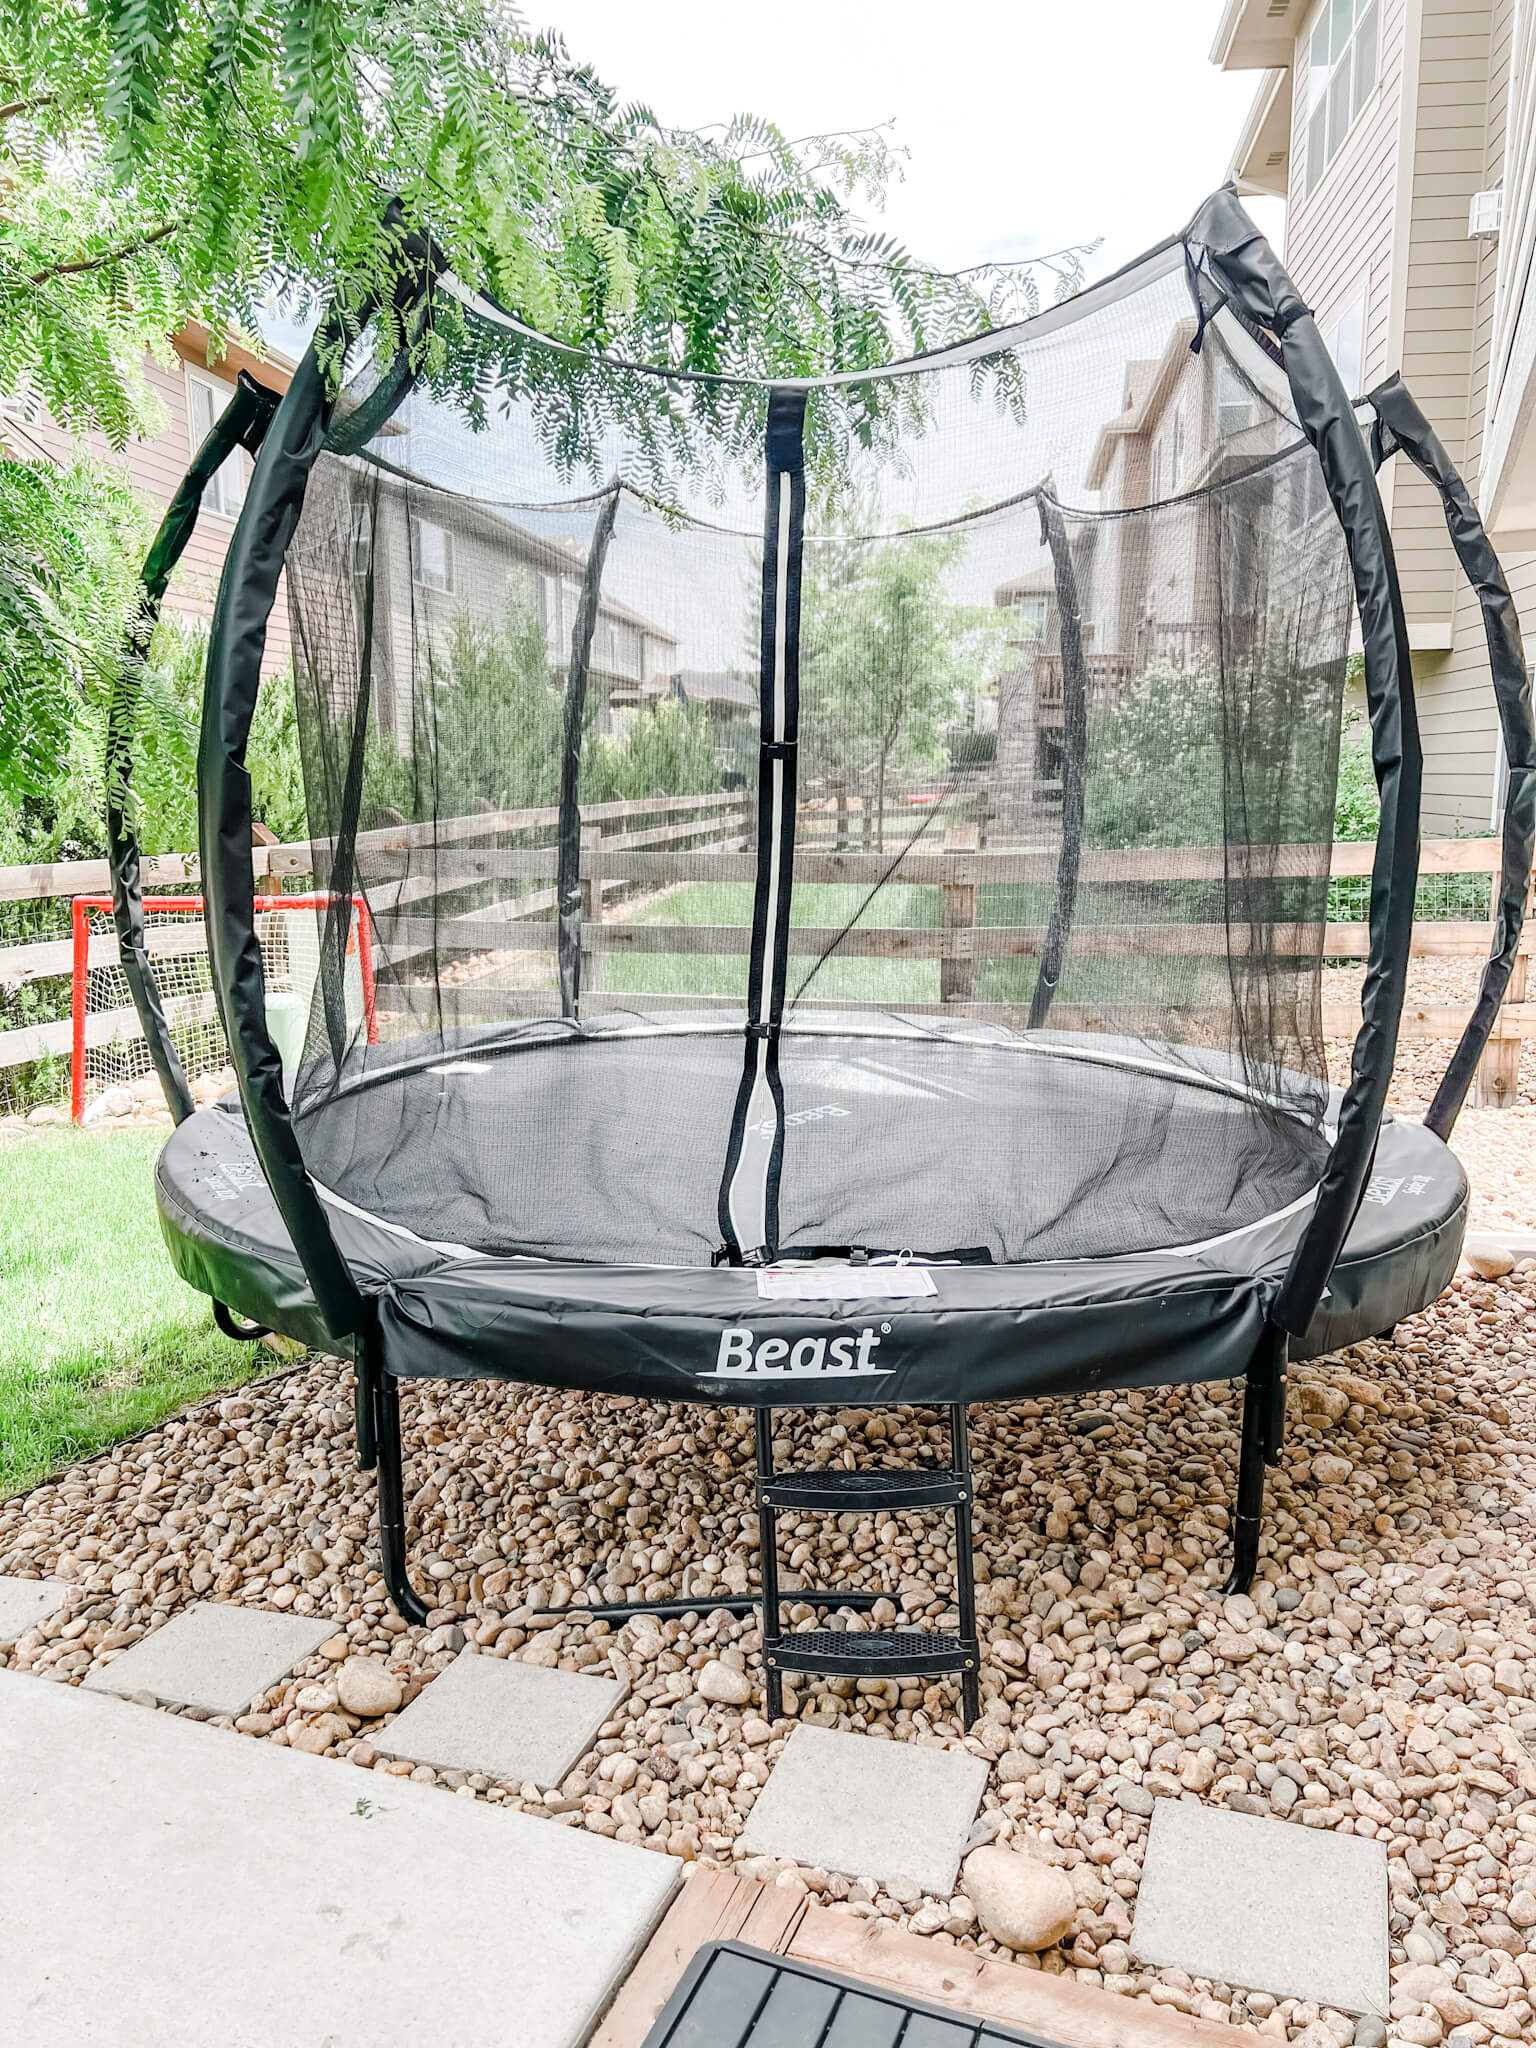
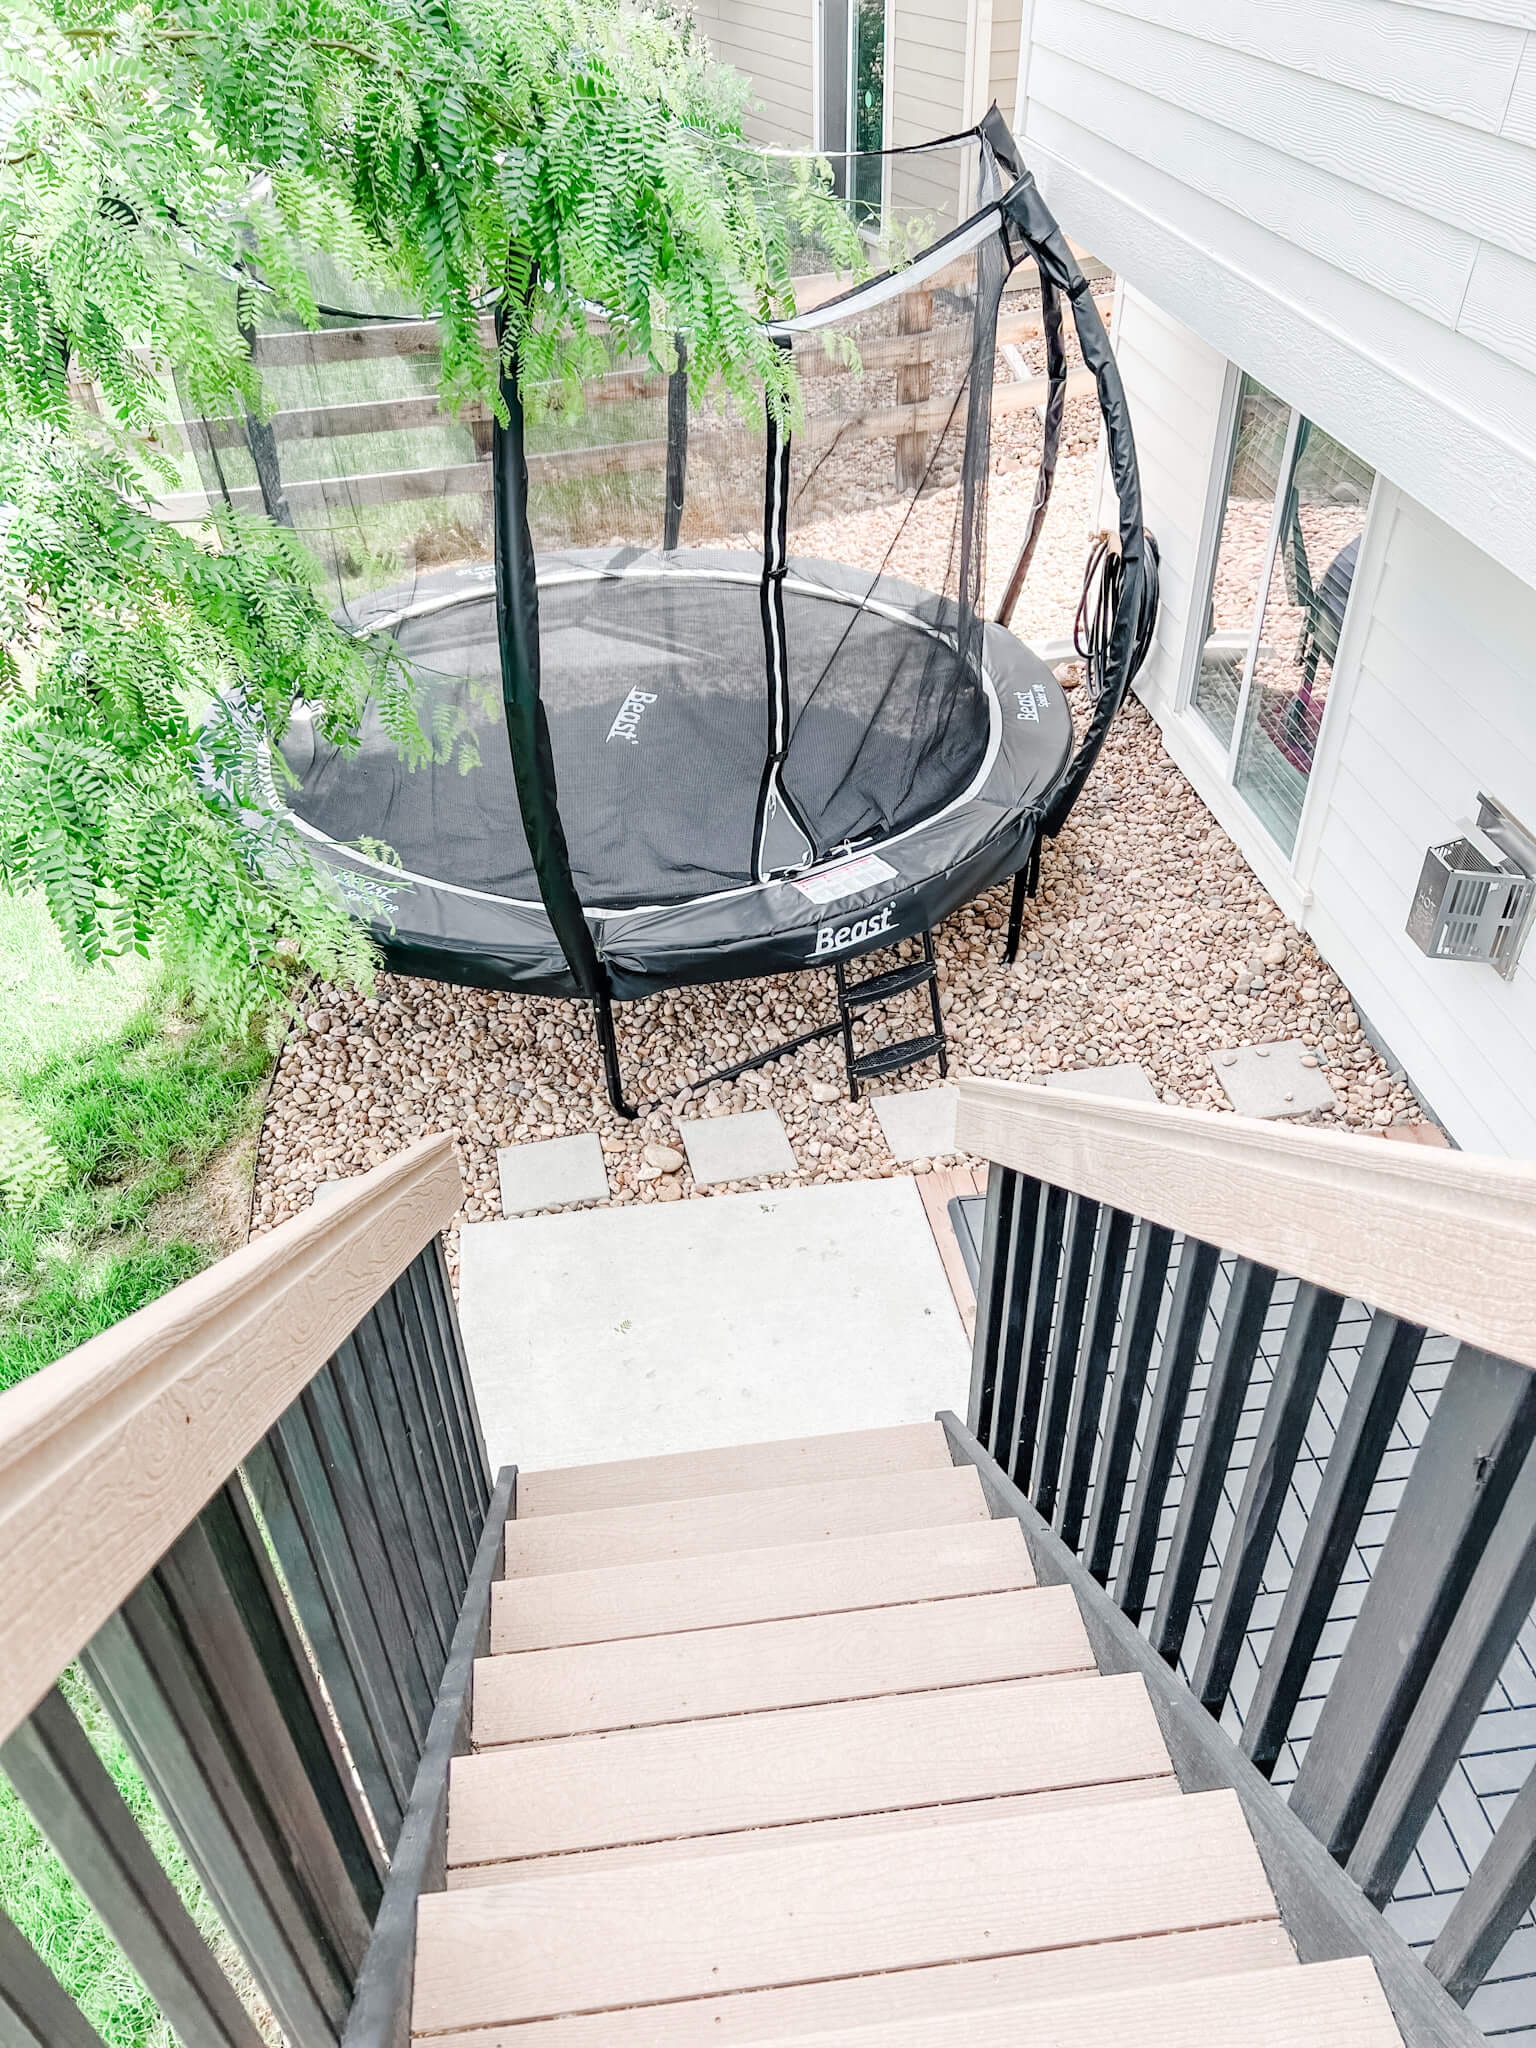
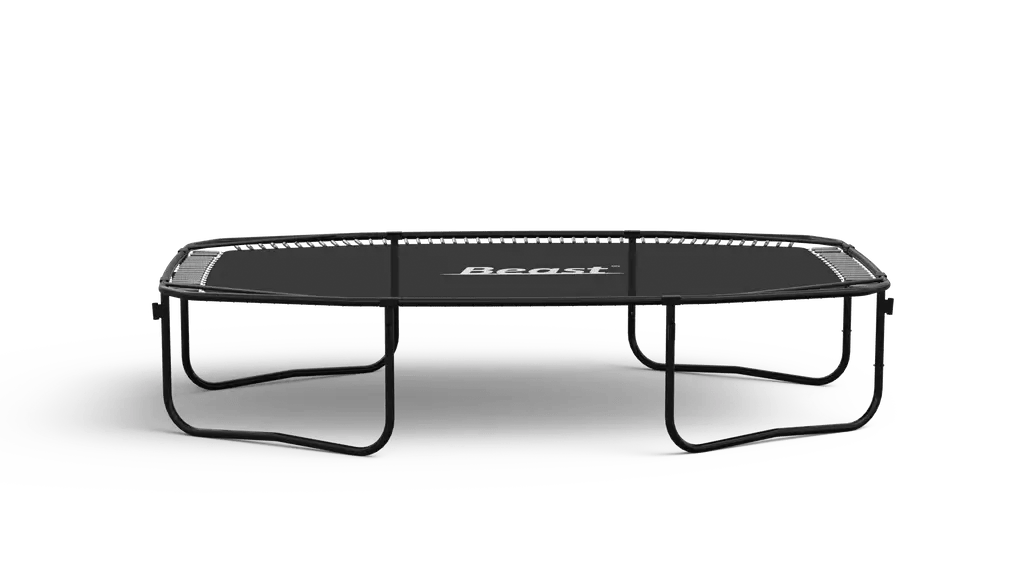
Beast Trampoline Review: If you’re looking for a high-quality trampoline, then you should definitely check out the Beast Trampoline. We were immediately drawn to this trampoline because of its safety features. The first thing we noticed was the safety net that surrounds the entire trampoline. This net is attached to curved poles that are wrapped in foam and covered with canvas. It’s clear that a lot of thought went into designing this trampoline!

Seriously, your kids will love this (and so will you... to give them something to do that isn't s...
TL;DR — We tested this thoroughly and it works as advertised. Good value, solid build quality, recommended for the use case.
Why we bought a trampoline
Our kids wanted a trampoline and all I could think was how dangerous trampolines are!
We had one growing up and my parents paid us to get rid of it because it made them so nervous to have us jumping on that thing. But being the type of parents that we are, we did some research and realized trampolines have come a long way in terms of safety.
We also re-did our whole backyard (full round up coming soon!). Check out our IKEA Runnen Decking Review and our Outer Furniture Review for a preview.
Trampoline Safety Standards
Trampolines today, like the Beast Trampoline, adhere to well-defined safety standards set by ASTM International. These standards ensure that trampolines are designed to minimize risks by incorporating safety nets, padded poles, and secure enclosures. The emphasis on these features aims to prevent injuries related to falls or improper landings.
The regulations also cover the durability of materials against environmental wear. By aligning with these guidelines, Beast Trampoline demonstrates a strong commitment to safe recreation, making it a trustworthy option for families. Knowing this standardization can give you peace of mind when choosing our trampoline.
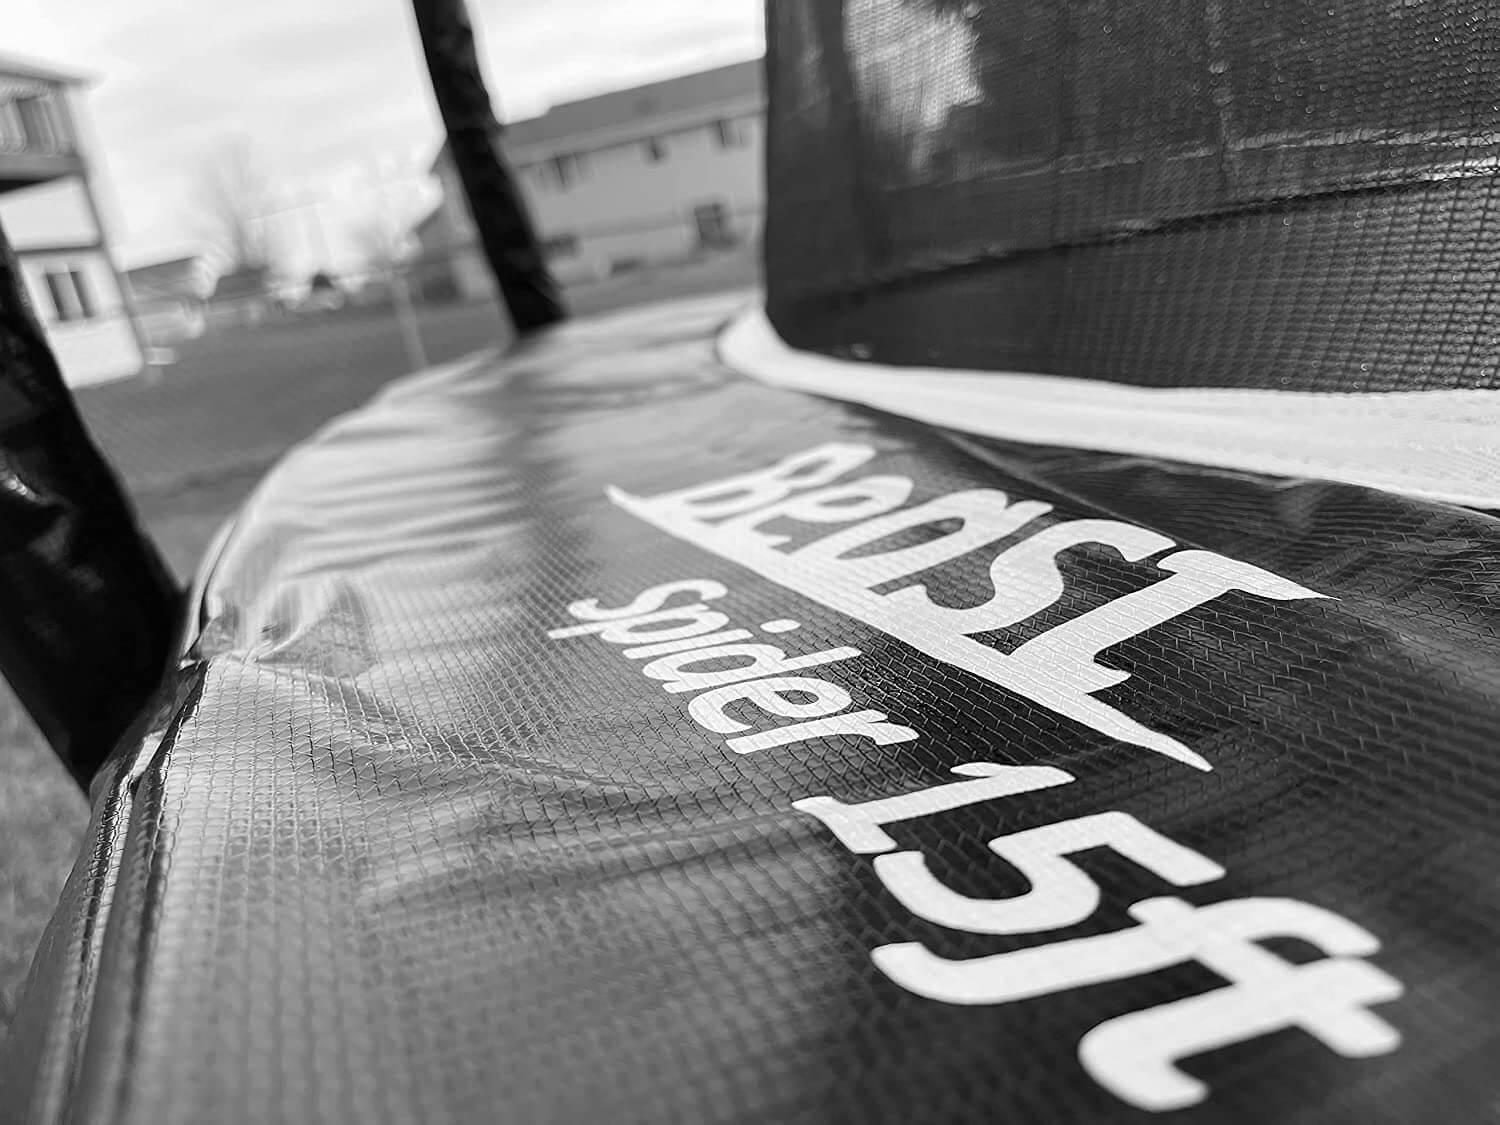
What Trampoline we decided on: The Amazing Spider Trampoline by Beast

This is why we decided on The Amazing Spider Trampoline by Beast Trampolines in the 10’ option. Let’s dive a little deeper and tell you why we picked this outdoor trampoline over others and some tips on how to put it together.
Why we picked The Amazing Spider Trampoline by Beast Trampolines over other options
We looked for many things when looking for in a trampoline such as safety, quality, price, and reviews. With that being said the Beast Trampoline was one of the most safe options we found. It had great reviews and people seemed to love it! We also loved that it was a bit cheaper than some of the other options but didn’t sacrifice quality.
First things, first: Safety
The first thing we were looking for was safety features to make sure that the kids were safe jumping on the trampoline.
Comparative Analysis with Other Brands
Let’s see how Beast Trampoline compares with other leading brands. Many trampolines out there offer solid safety features, but Beast Trampoline stands out with its blend of quality and affordability. While brands like Springfree focus on eliminating springs, Beast emphasizes sturdy frames and safety nets, catering to a different safety preference.
Compared to pricier models like Skywalker, Beast offers a balance of cost and quality without cutting corners on key features. It’s comforting knowing you’re getting a reliable product that doesn’t break the bank and still keeps your family safe.
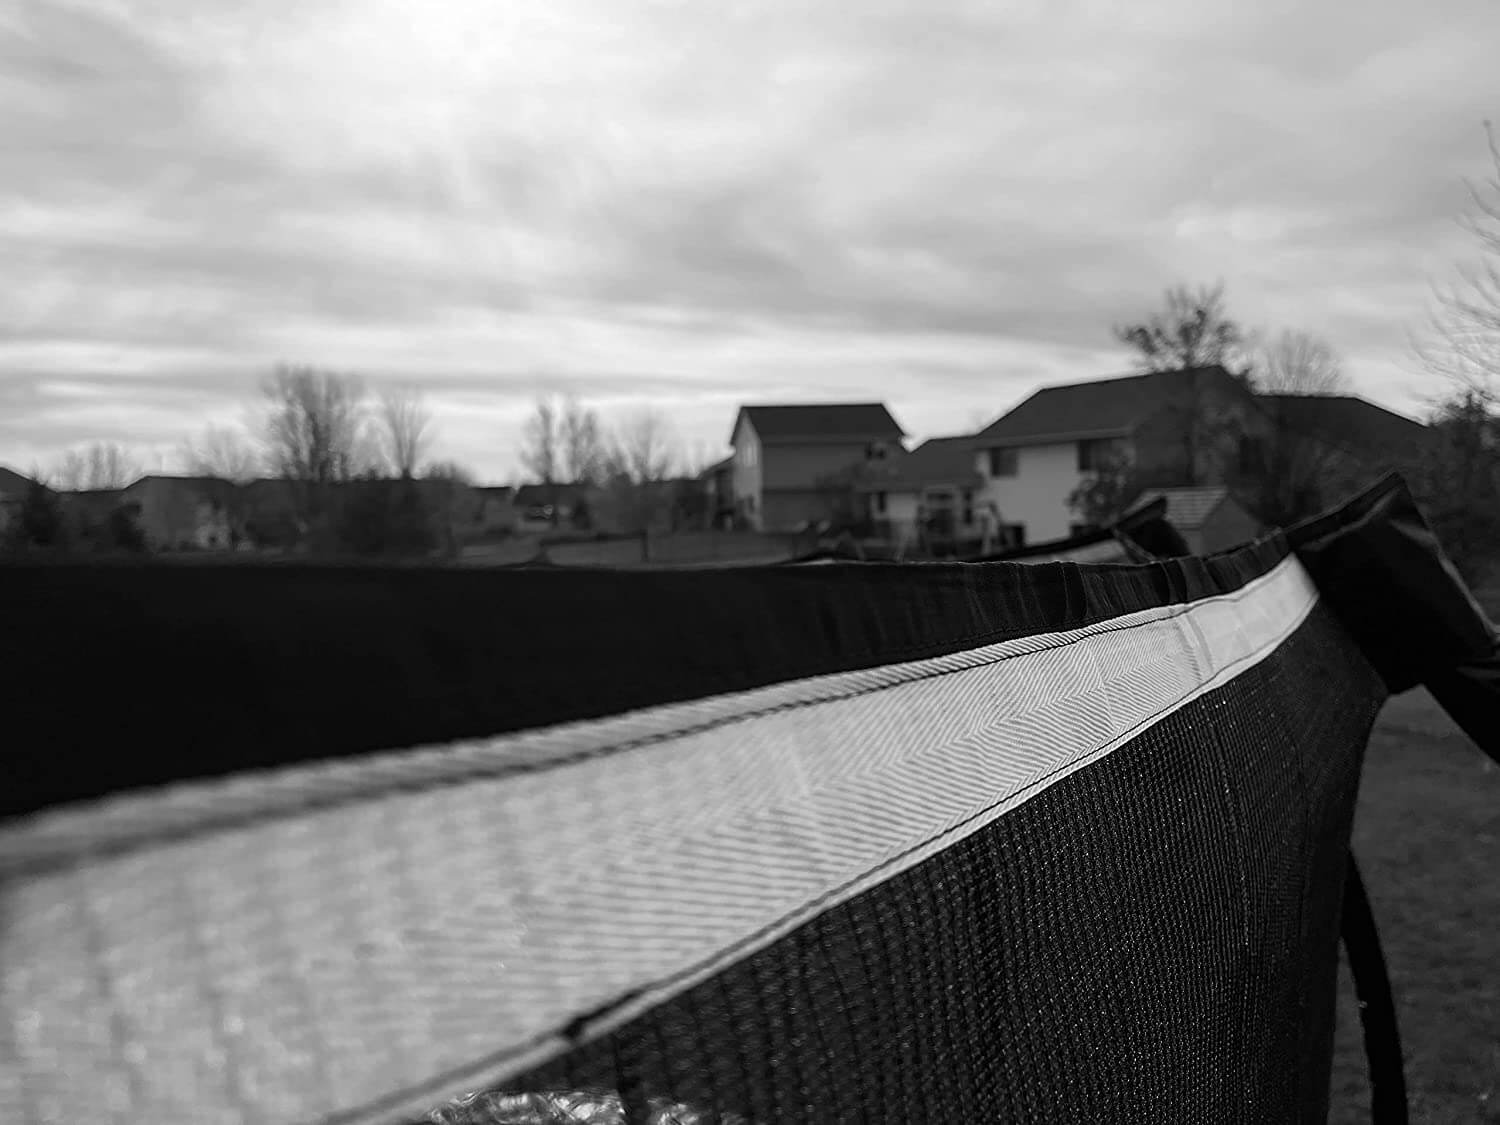
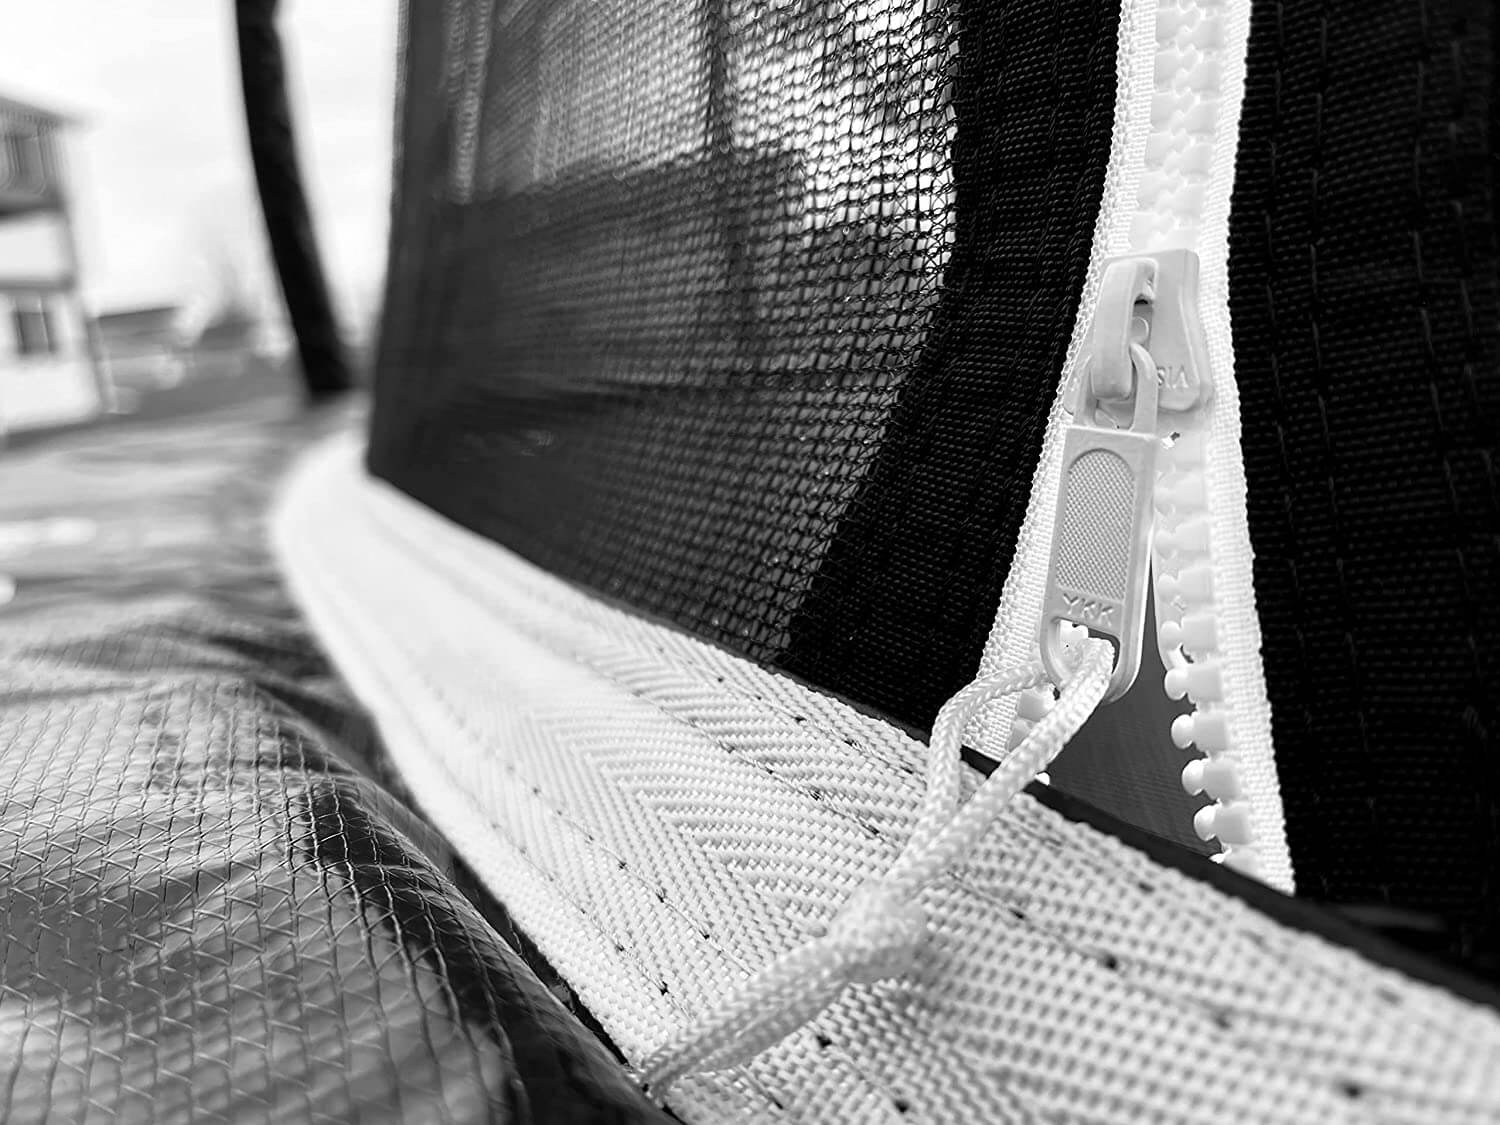
Safety Net Enclosure
A safety net enclosure was super important for us when looking at all the trampolines, let me give you a little more detail. We wanted an enclosure net that surrounded the trampoline with curved poles. Each enclosure pole is curved on this trampoline, holding the safety net in place. These enclosure poles are wrapped in foam and then they have coated canvas covers that go over them. This seemed very thorough and well-engineered.
Common concerns with trampolines include falls and improper landings, but the Beast safety net tackles these effectively. With securely wrapped foam-covered poles, kids can bounce safely knowing the net will keep them from accidentally jumping off.
Always ensure that the net is properly installed and regularly check for any wear and tear. Parents can teach safe jumping techniques and recommend one jumper at a time to minimize risks. By adhering to these simple guidelines, you significantly reduce the chance of injuries.
Closer to the ground
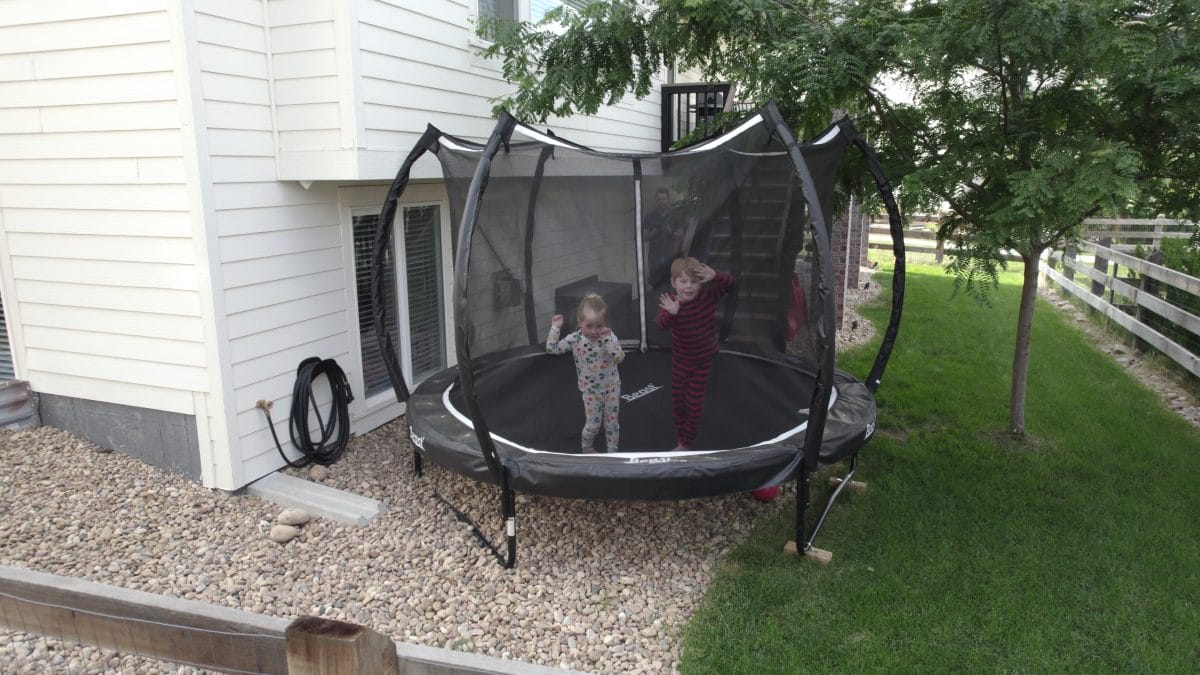
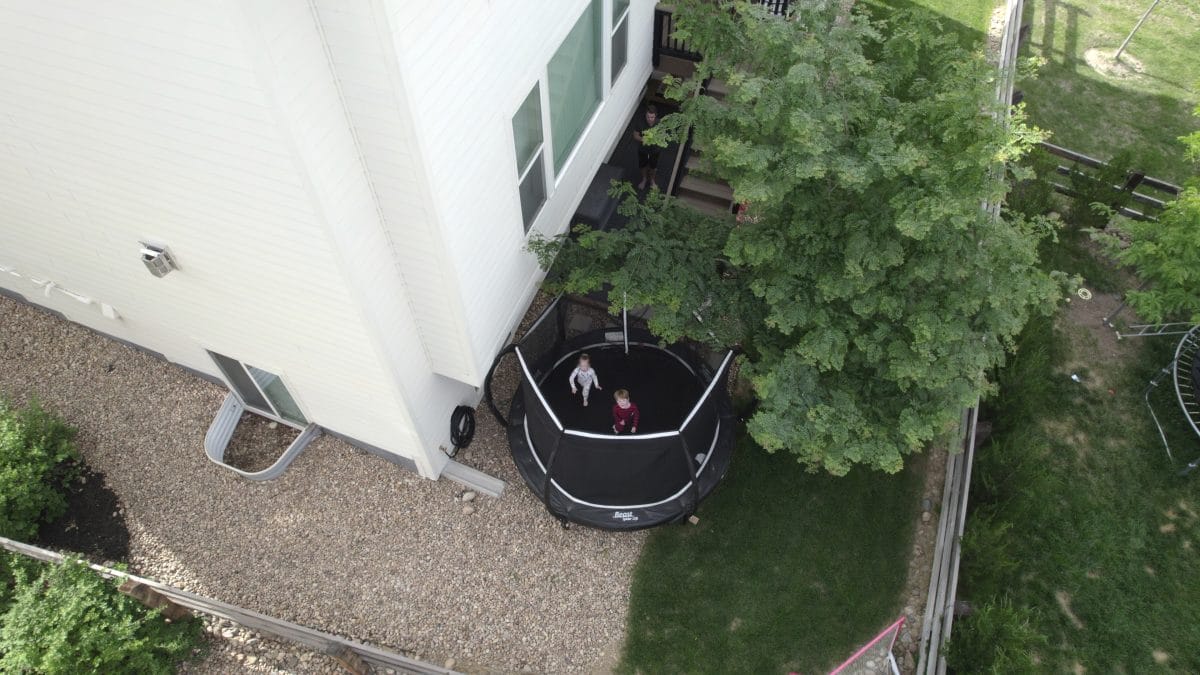
We wanted the trampoline to be lower to the ground (and a sturdy frame), for safety reasons. The Amazing Spider Trampoline by Beast Trampolines is low to the ground, but also doesn’t have a weight limit (yes, how is that even possible – usually there can be a high weight limit… but no weight limit?). The low height limits the distance someone could potentially fall off the trampoline.
Having a trampoline closer to the ground isn’t just part of better safety standards, it also helps prevent it from being picked up for a wind storm or just when it’s really super windy. Of course, we have it anchored and actually buried under rock, but the winds can get pretty strong where we live.
Safety Pads
We wanted to make sure the tramp had a strong safety pad covering the springs. We didn’t have a safety pad (or even a safety enclosure) when we were kids – but the added safety is huge here.
These foam pads surrounding the trampoline are extra thick to protect someone who accidentally may jump on one of the pads.
The safety features on Beast Trampoline are top-notch, from the safety net that surrounds the entire trampoline to the curved poles that are wrapped in foam and covered with canvas. This makes it a safe option for your family.
Free Beast Ladder Included
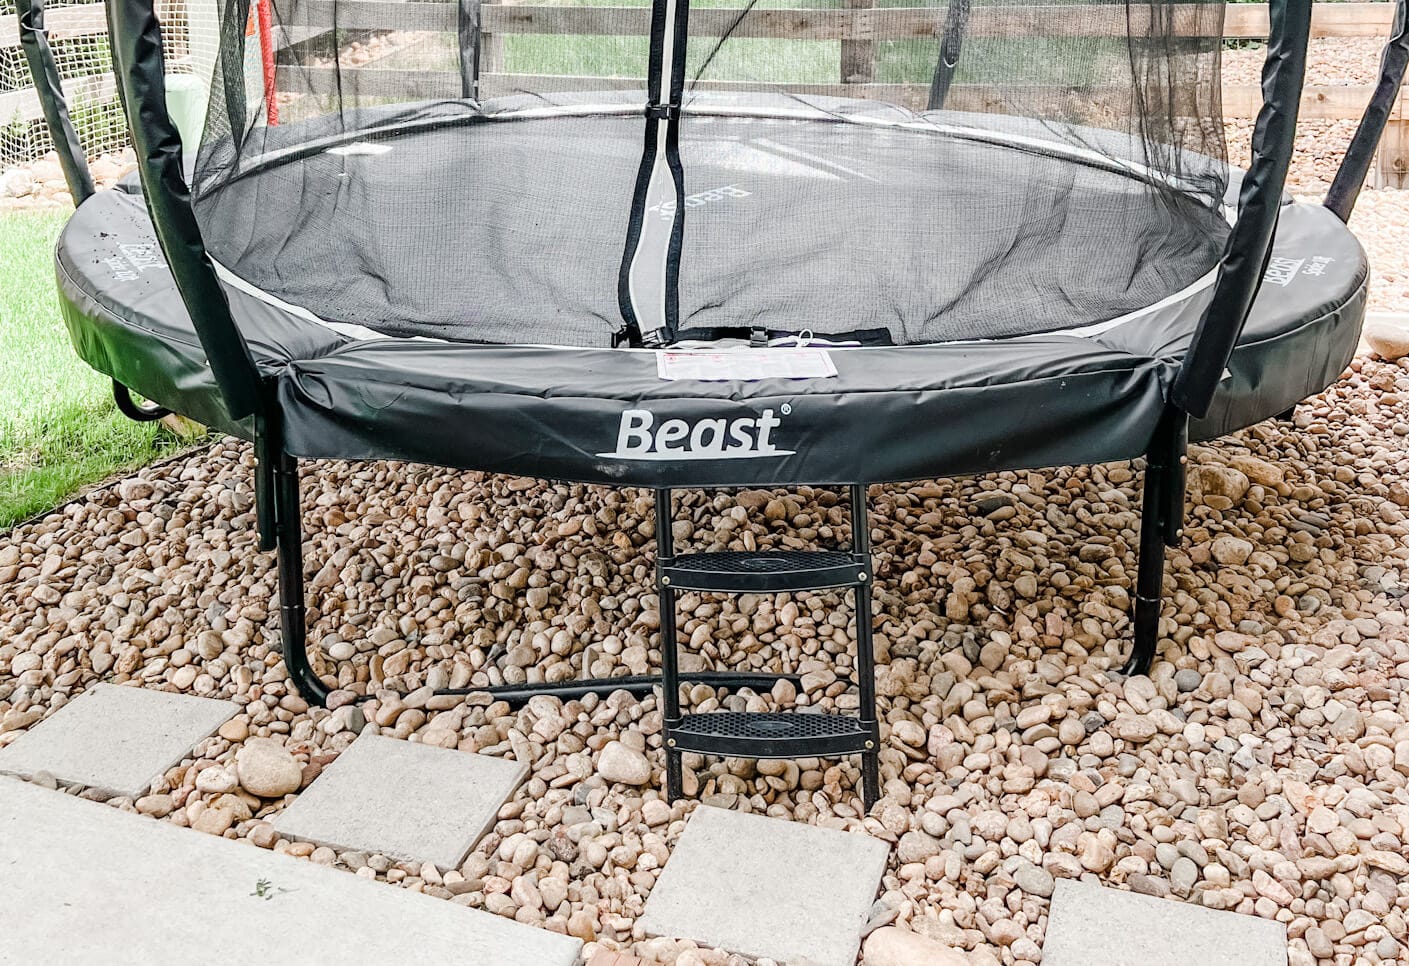
They also include a free Beast ladder, which makes it easier for our kiddos to get in and out of the trampoline, too.
I know that seems like a small deal, but there’s no way they would get out without the ladder.
The overall look
We wanted black coated metal bars and a black and white trampoline without any crazy colors. We didn’t want the trampoline to be a huge eyesore in our yard and The Amazing Spider Trampoline by Beast Trampoline was one of the most aesthetically pleasing ones we could find (we’re looking at you – other trampolines – many trampolines are U-G-L-Y).
Smaller Size
Since we have a smaller yard, we wanted a smaller trampoline.
Beast Trampoline offers lots of different sizes, but we went with the 10’ option because we wanted the majority of the trampoline to fit in the rocked area of our yard and not go into the grass.
No Weight Limit

This size does not have a weight limit (unlike many trampolines). 3-4 small kids can still easily bounce at the same time, thanks to the strong frame. The frame is fully galvanized inside and out.
By the time the kiddos are much larger, they may not be interested in the trampoline anymore, so we will cross that bridge when we get there.
Adults can still jump on the 10’ trampoline, but probably no more than 1 adult and 2 kids at a time. Officially, Beast says this new trampoline can only have one person on at a time (not the whole family).
The Price
Lastly, the price was a big factor in purchasing the Amazing Spider Trampoline by Beast Trampoline. Similar trampolines as far as aesthetic and safety features were all $1500+ and we wanted to keep this as affordable as possible considering we weren’t sure how much or how long our kids would use it.
We bought the 10 Foot Version for $747 (with shipping included). As of the time of writing this, only the 14 and 15 ft versions are available.
You can also get spare parts on the Beast Website.
What we wish we would have known about The Amazing Spider Trampoline by Beast Trampoline before we purchased it:
It wasn’t all perfect – there were a few things we wish we had known about the Amazing Spider Trampoline by Beast Trampoline before we purchased it.
Assembly – not super easy to assemble
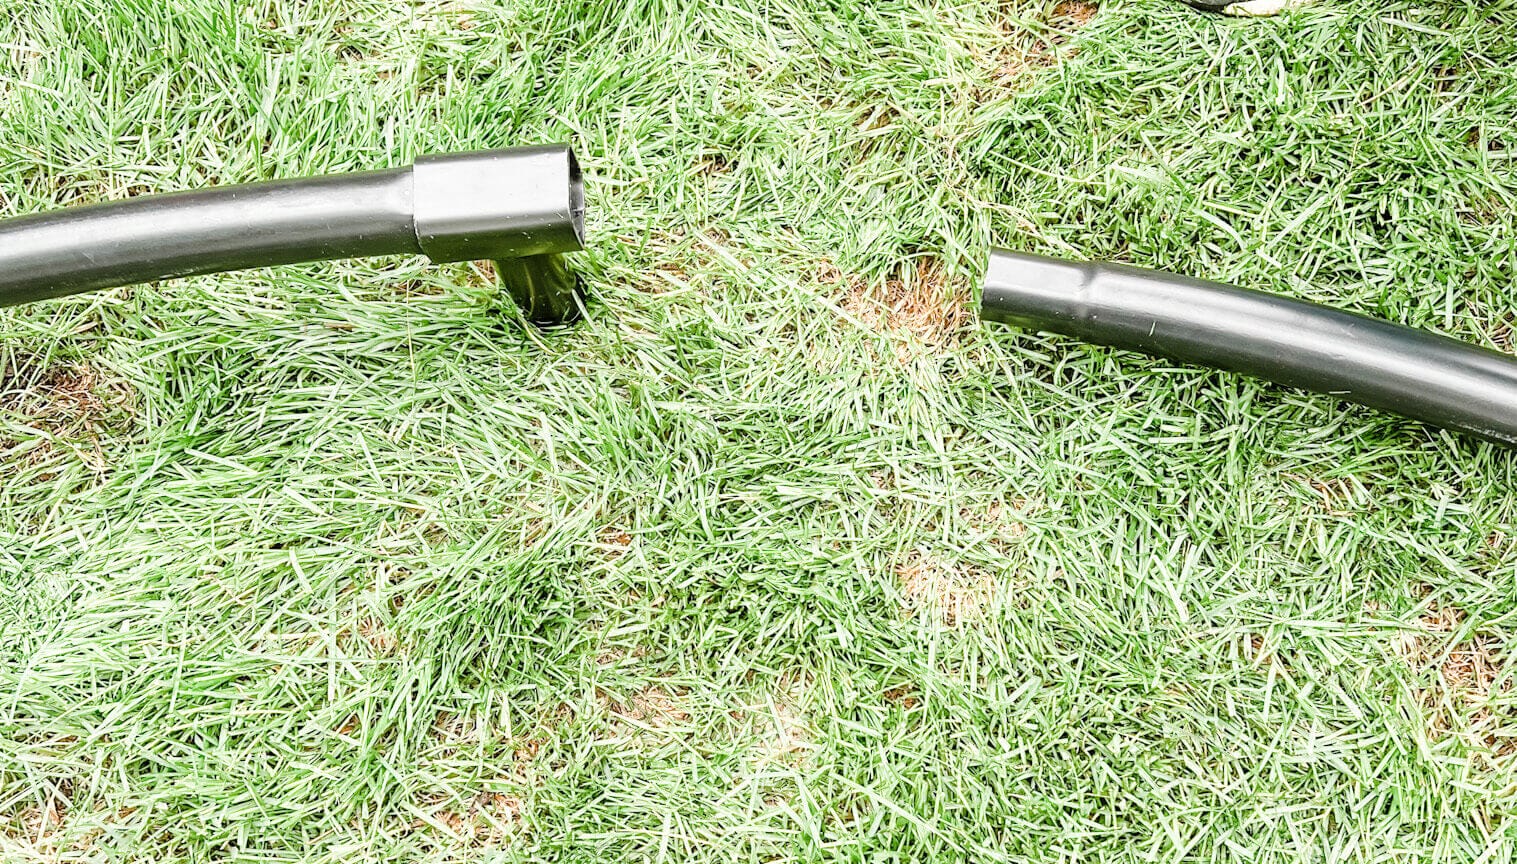
It was very hard to get together.
This might be because we bought the 10’ option and the circumference was tighter than a larger trampoline. We got all the pieces together except the last one and it was nowhere close to touching.
I called Beast Trampolines and the customer service person told me to put soap on it to get it together, which was an incredibly unhelpful suggestion because the pieces were nowhere near making a circle, so that was a little disappointing.
I have included some pro tips for assembly of the Amazing Spider Trampoline by Beast Trampoline below, so hopefully, you won’t have these same problems.
There were a couple of spots where the stitching didn’t catch both pieces in the safety net and we have messaged Beast Trampoline’s customer service and they wrote back to us and are shipping some new netting to go on the enclosure poles).
Maintenance Tips for Longevity
Keeping your Beast Trampoline in great shape is easier with a few maintenance tips. Regularly inspect all components for signs of wear, especially after frequent use. Cleaning the mat and net with mild soap and water removes dust and dirt, keeping it fresh.
Storing the trampoline indoors during harsh weather or using a cover can extend its life considerably. Tightening bolts and checking springs periodically ensures the trampoline remains stable and safe. Following these steps will ensure your trampoline offers a fun and safe experience for years. To further protect your trampoline, consider applying a water-repellent spray to the fabric components for an added layer of protection against moisture. This measure is especially beneficial in humid areas, preventing mildew and extending the life of both the mat and safety nets. Regular maintenance really keeps everything intact for longer use.
Who is Beast Trampolines for?
The Amazing Spider Trampoline by Beast Trampolines is a great trampoline for anyone looking for upgraded safety features, a black and white clean aesthetic, and a budget-friendly price.
We also love all of the different size options because depending on the space you have available you can really customize the fit.
Material Quality and Durability
When it comes to material quality, Beast Trampoline is top-notch. They use UV-resistant materials that withstand harsh sunlight, which is important for outdoor use. The frame’s galvanized steel ensures that it’s resistant to rust, promising longevity even in variable weather.
Their thick mat fabric, designed for resilience, provides a durable jumping surface. The stitching on the safety nets and pads is double-checked for extra strength. All these features contribute to the trampoline’s ability to endure the test of time, ensuring countless hours of safe fun for everyone involved.
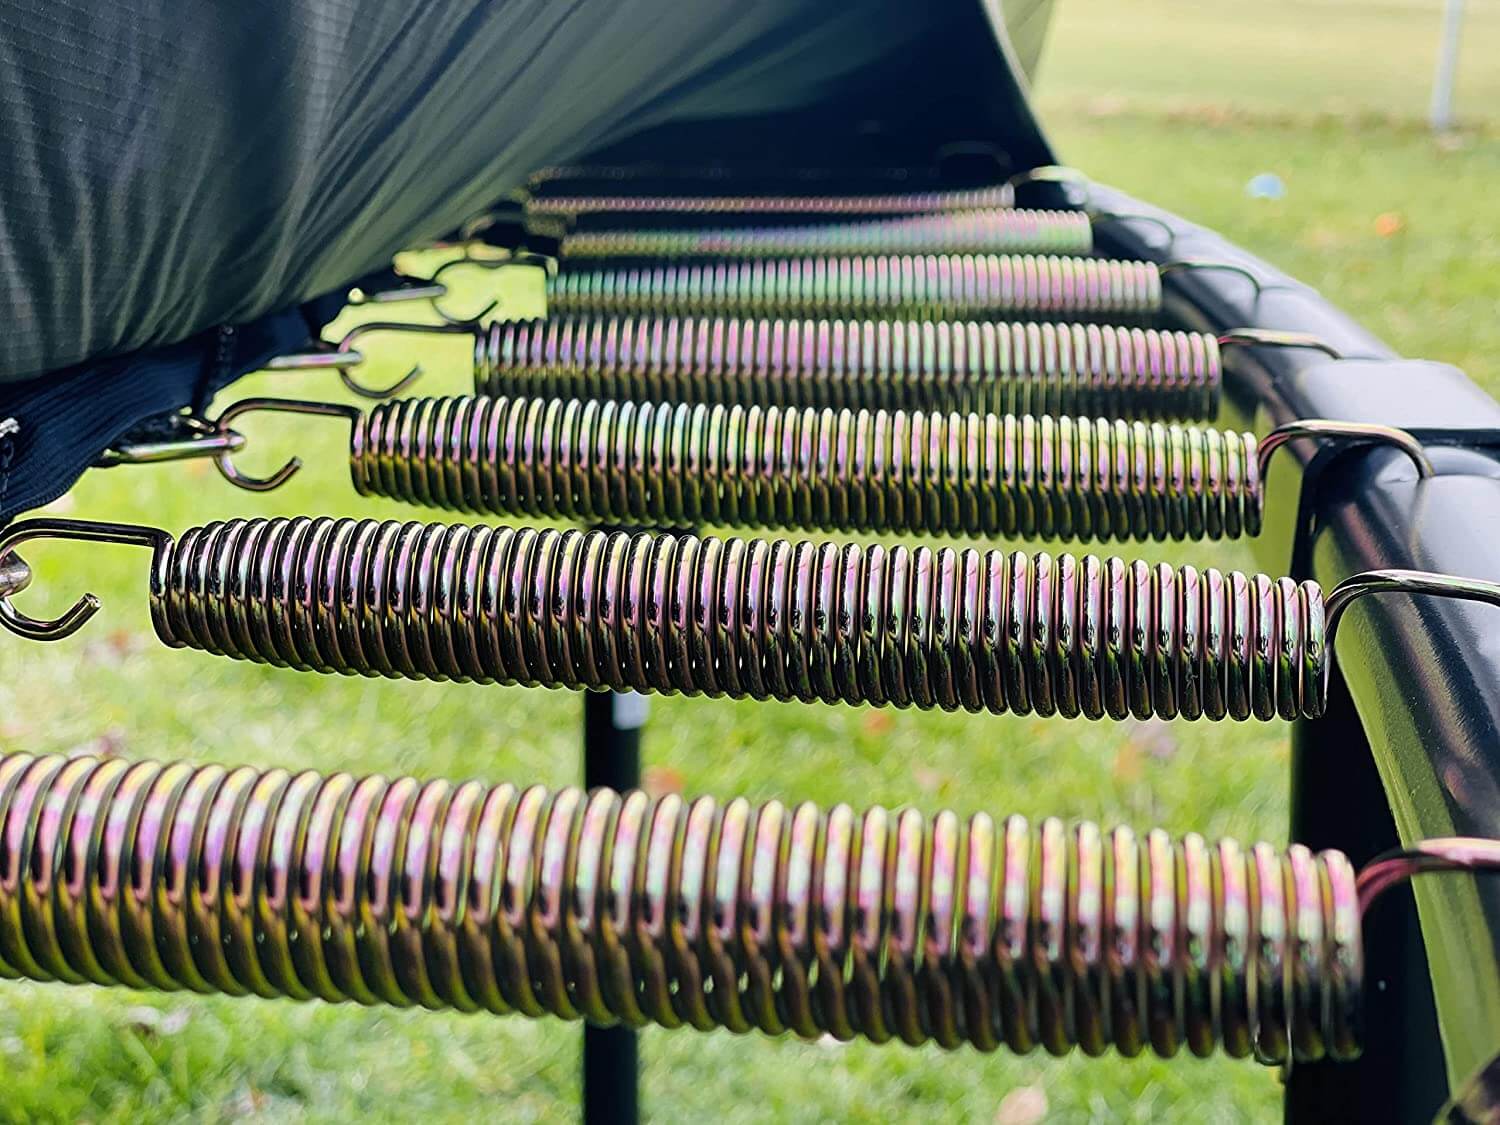
Furthermore, Beast Trampoline features corrosion-resistant springs that maintain their elasticity over time, ensuring better bounce performance. The UV-resistant jump mat not only combats fading but also preserves the spring’s tension, enhancing the overall jumping experience. This combination of superior materials ensures that the trampoline is reliable and structurally sound over many seasons.
Pro Tips on How to Assemble the Amazing Spider Trampoline by Beast Trampoline
OK, we had some troubles with assembly (I wouldn’t say this was an easy assembly at all), and you can’t assemble solo. Get a friend to help you out.
Almost nothing comes pre-assembled. It doesn’t even come in just one box, this trampoline was delivered in two.
Here’s how to assemble this trampoline safe and easy:
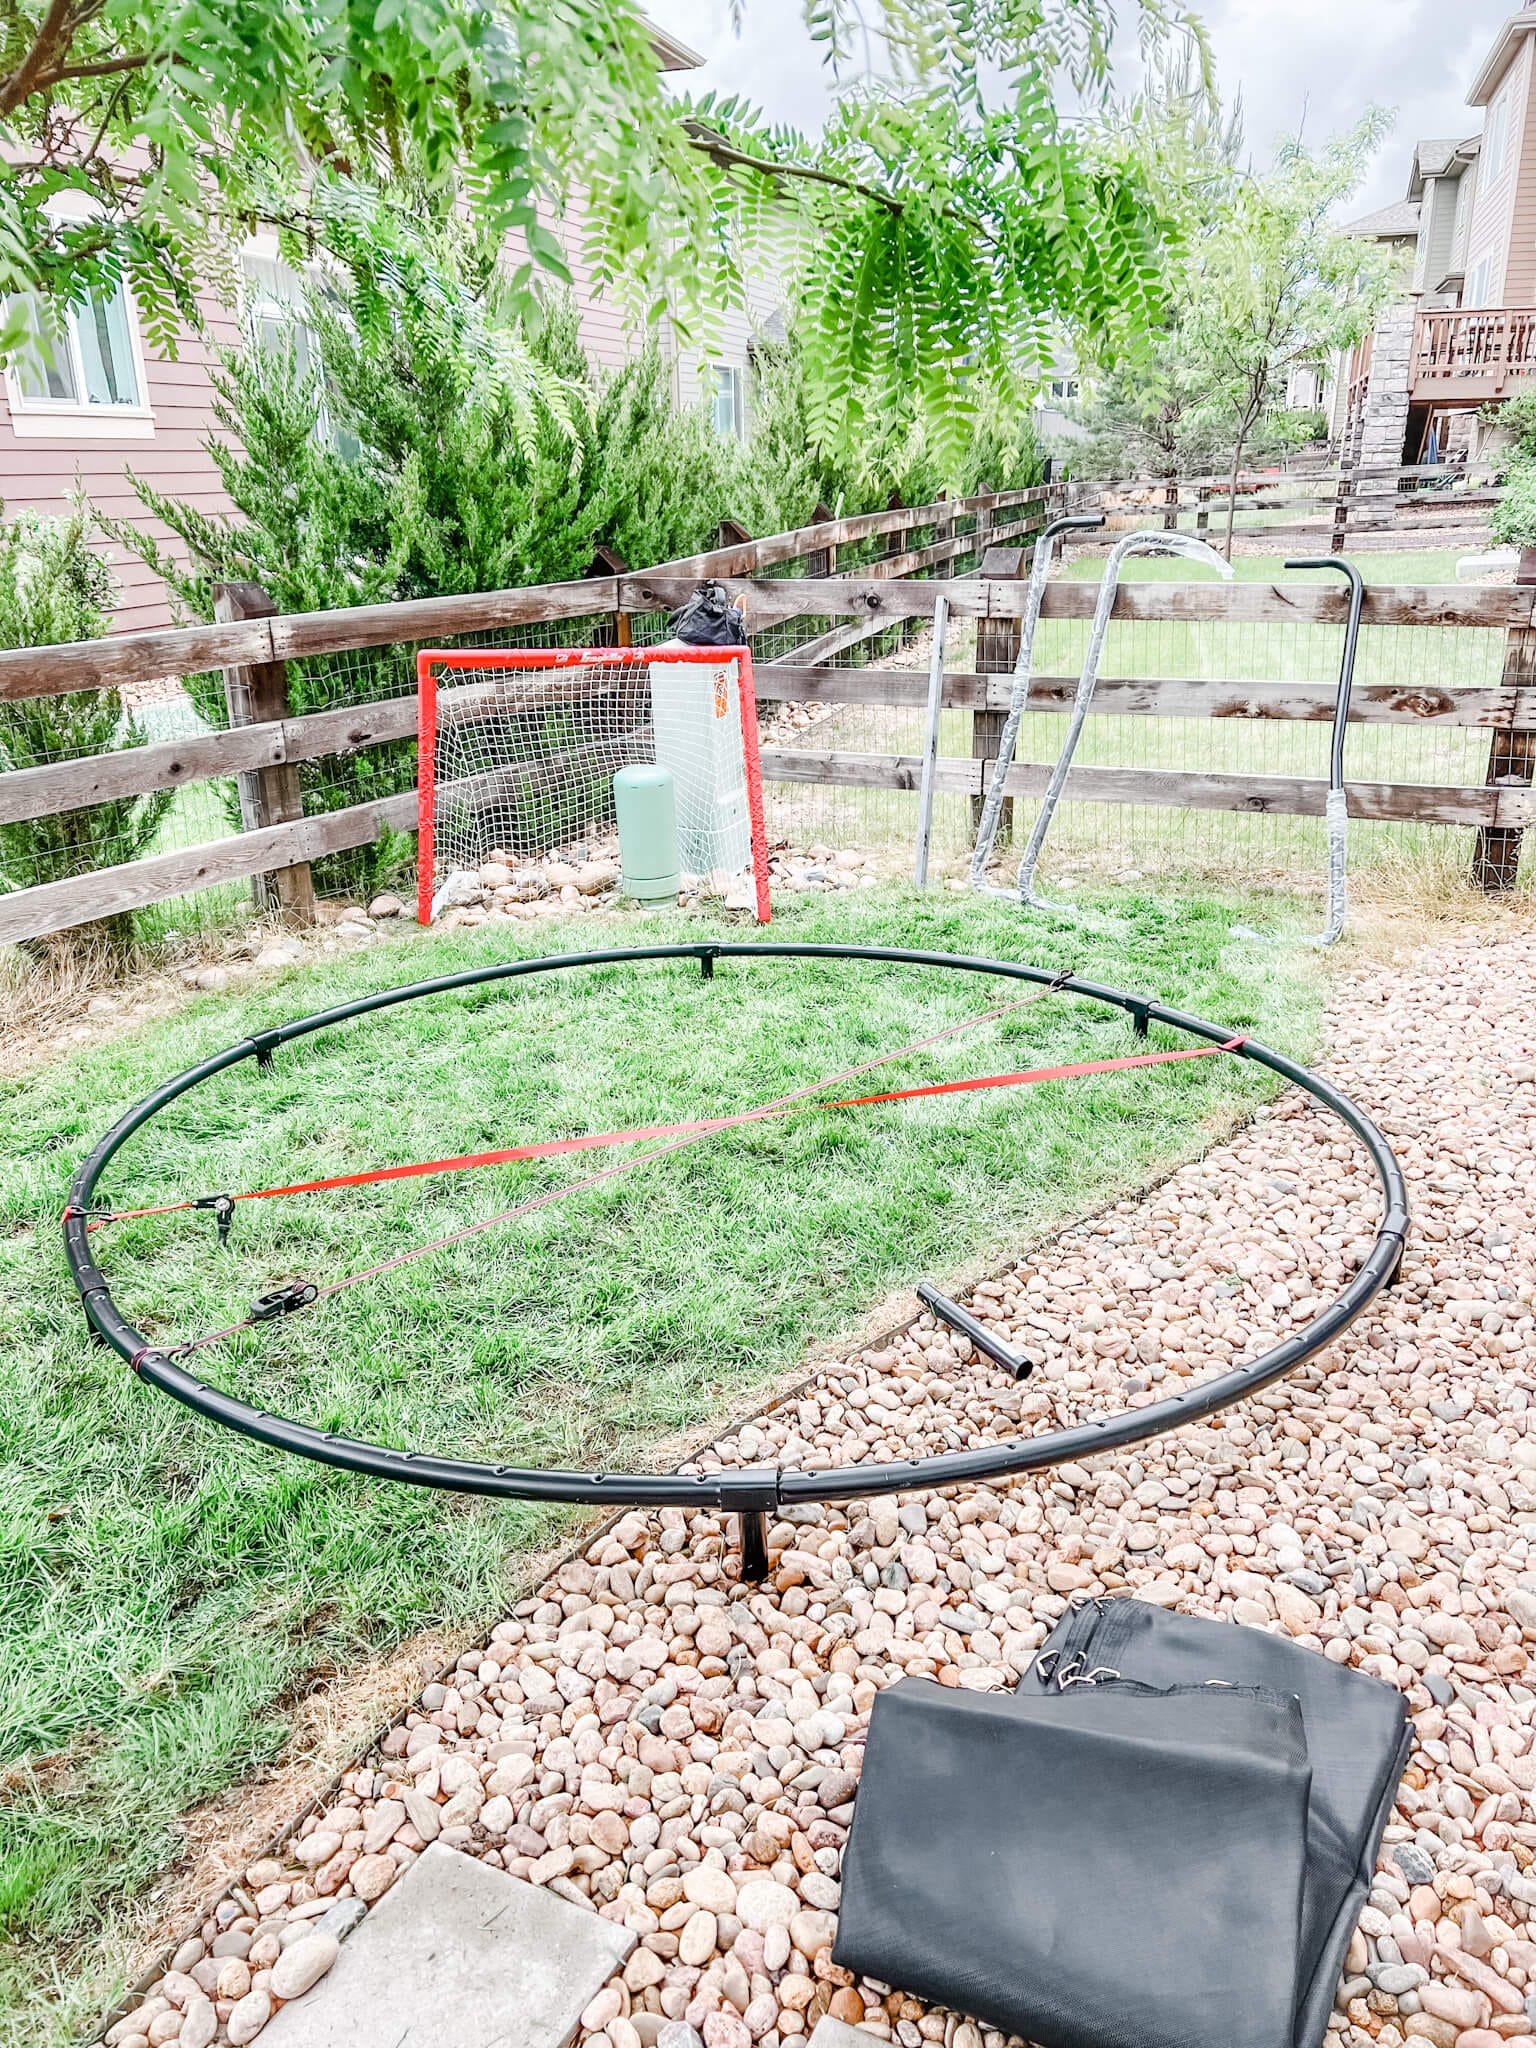
- Take out all of the pieces and start with the base. Use a rubber mallet to connect the circumference pieces. Tap the larger end in with the rubber mallet before you do the smaller end on the other side.
- Once all of the circumference pieces are put together, except for the last one, you can use straps to pull the circle tight and connect the final pieces.
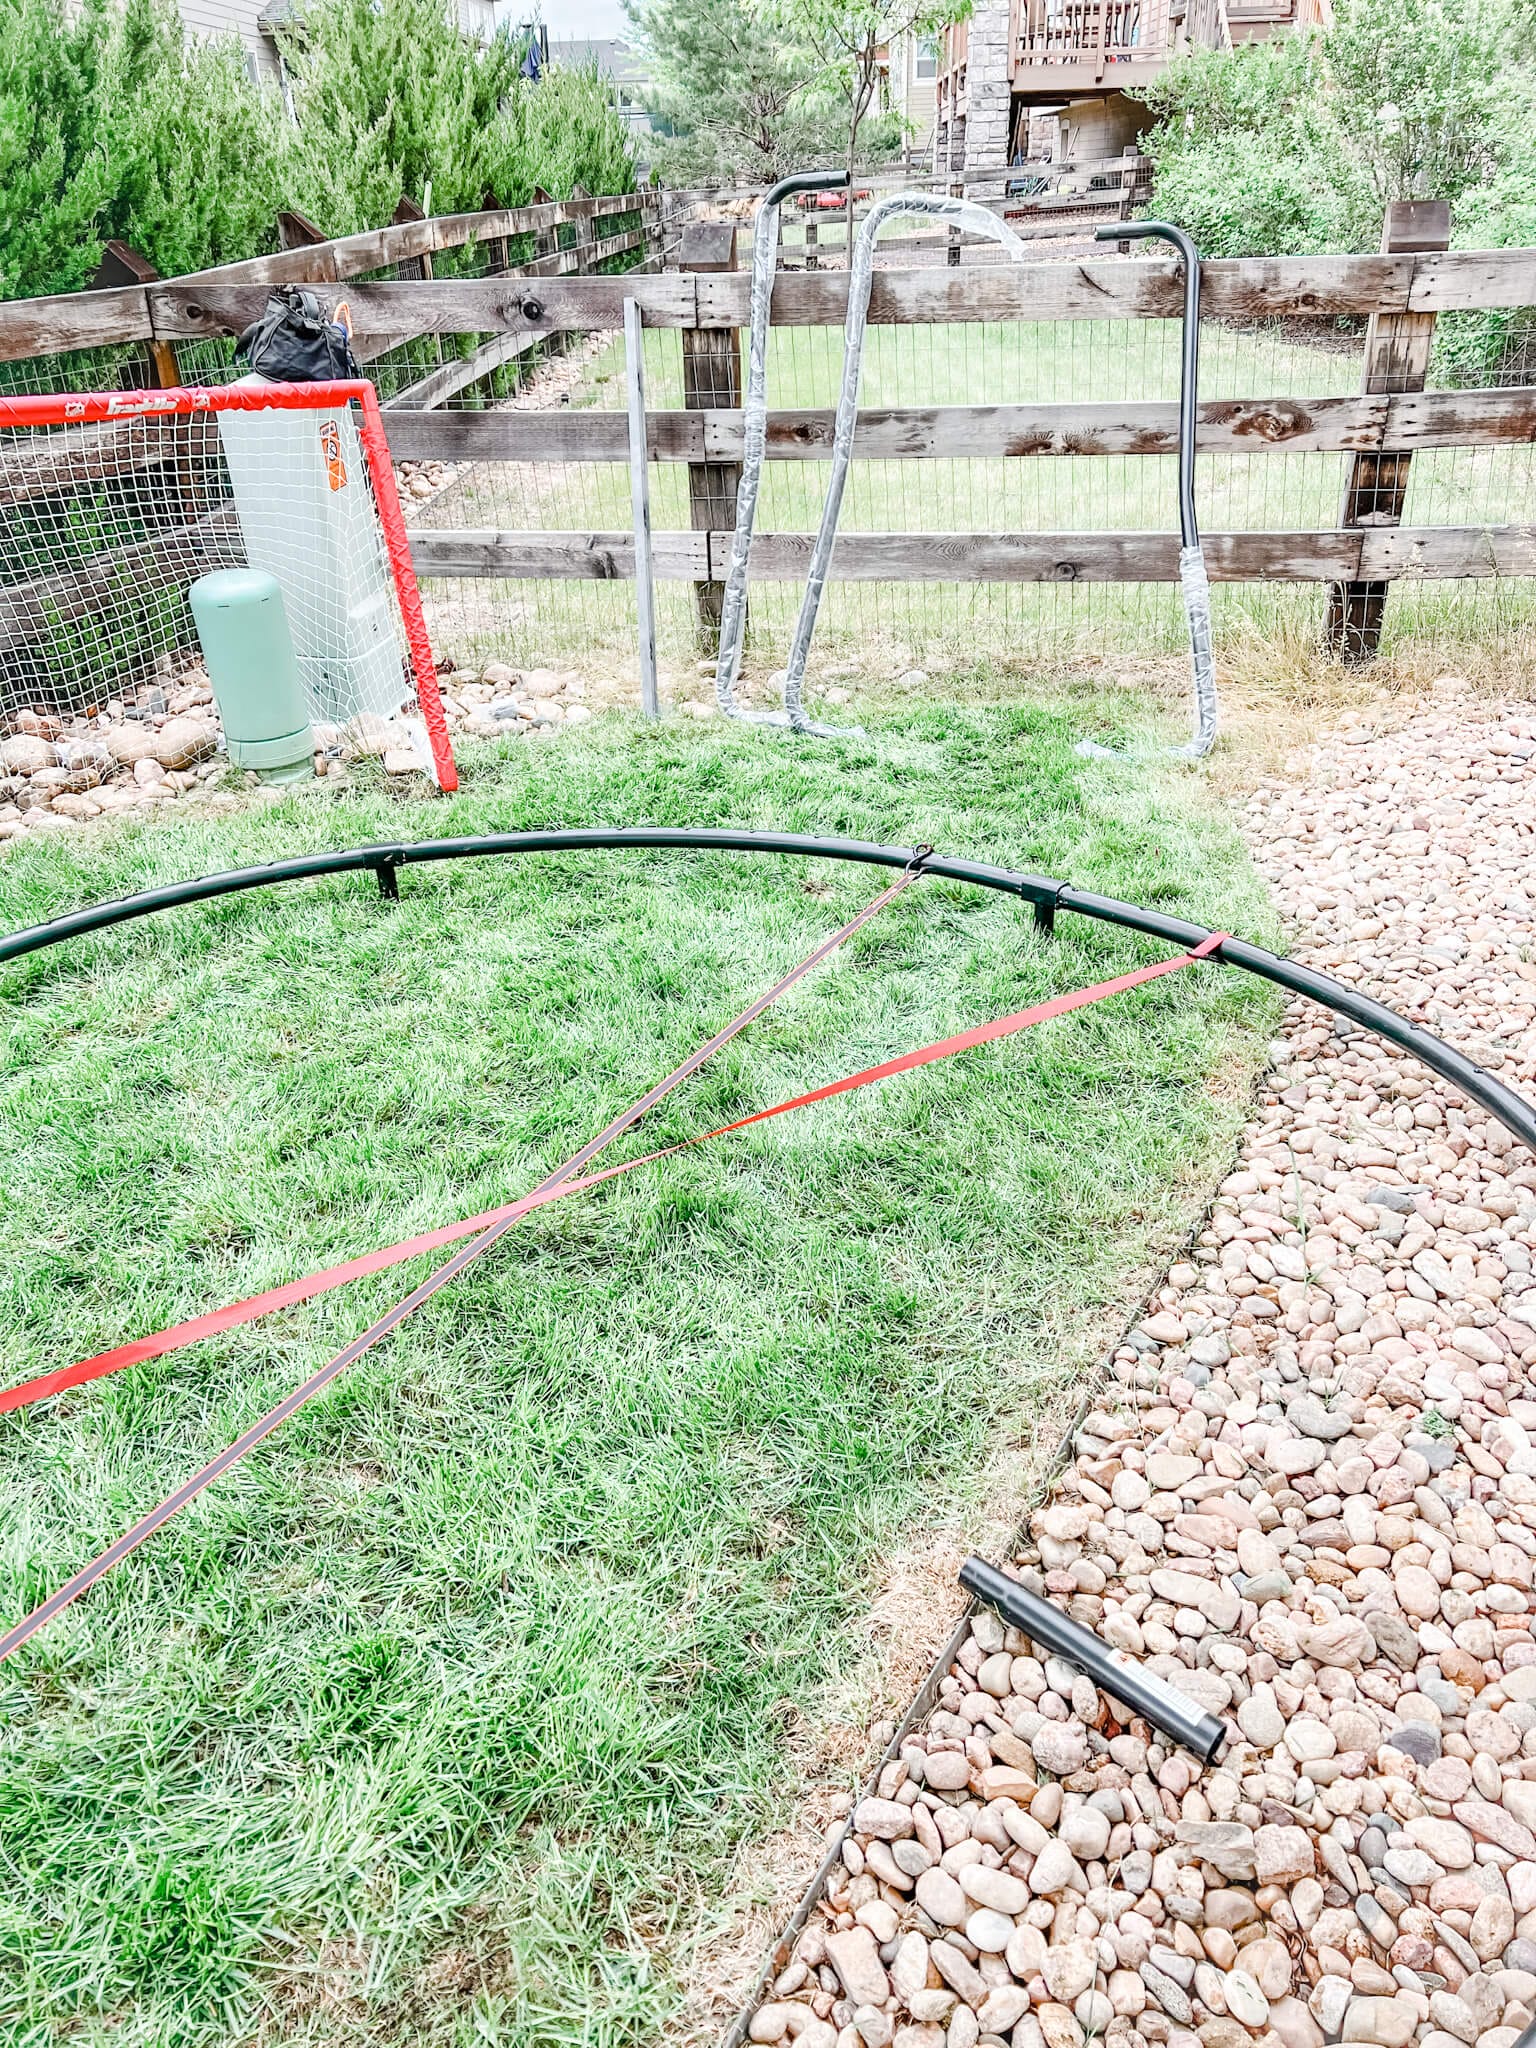
- Make sure you are on level ground before securing the bottom leg braces. You do not need to be in the exact location of where the trampoline will be placed. It is still very light and easy to move before you attach the safety net.
- Next you attach the springs and the jumping mat to the circular frame. Be sure to count the holes on the frame and the hooks on the mat before you get started. The 10’ trampoline had less springs than was illustrated in the directions. The directions were made for a much larger trampoline, so be sure you know how many springs your specific model has and then attach them at 12 o’clock, 3 o’clock, 6 o’clock and 9 o’clock first. Again, make sure to count the springs and the hooks so they will line up once all the springs are on. After you attach those four springs, you can slowly fill in the remainder of the springs.
- After you add the spring pad, move your trampoline to the desired final resting spot. This is a great time to level the trampoline before you add the safety net because it becomes much more cumbersome once that is in place. In order to level our trampoline we got a very long level and placed it in the center of the trampoline. We had to dig down in the rocks on two sides and on one side we lifted the trampoline and bolted it onto 2 4x4s. A level trampoline is very important for safety!
- Now is a great opportunity to stake your trampoline. Also another important safety step! We used rope and very long metal stakes to drive into the ground below the rocks. On the side that we have on the 4x4s we used galvanized hanger iron and screws to attach it.
- Lastly, attach the safety poles and safety net when you have everything in place.
Assembly: Overall Thoughts
This is what worked best for us through trial and error. The directions are very minimal with hardly any written instructions! Most of the instructions are simply visuals (think similar to IKEA, but a little less helpful).
Overall, we were able to assemble in several hours. Yes, hours.
I know that doesn’t sound like it’s a super easy assembly, and it wasn’t – but I wanted to make sure the trampoline was installed correctly for the whole family to enjoy.
What else we looked at – but didn’t get
To be honest, we were incredibly surprised at the number of different options available with trampolines these days. A couple of thing we looked at, but ultimately did not get:
- A Spring-Free Trampoline: it turns out there are other issues with spring-free trampolines and safety, too. Just because they don’t have springs, they still involve people jumping and the risk for injury.
- A rectangular trampoline: these are cool and we like the look of a rectangle trampoline, but it didn’t fit our yard design.
- In-ground trampoline: This is a SUPER sleek design, but it’s really hard to dig in our backyard. There’s no way we were going to dig for a trampoline.
The Amazing Spider Trampoline by Beast Trampolines Review: The Final Verdict
Seriously, your kids will love this (and so will you... to give them something to do that isn't s...
Overall, we think this trampoline is high quality and looks very nice once assembled. The assembly is a bit challenging, but if you follow our pro tips above, I think you can get it up in an afternoon. The upgraded safety features, the clean aesthetic and the budget friendly price point make this a great buy overall!